Honey Vanilla Spring Puffs
Highlighted under: Spring Recipes | Fresh Season
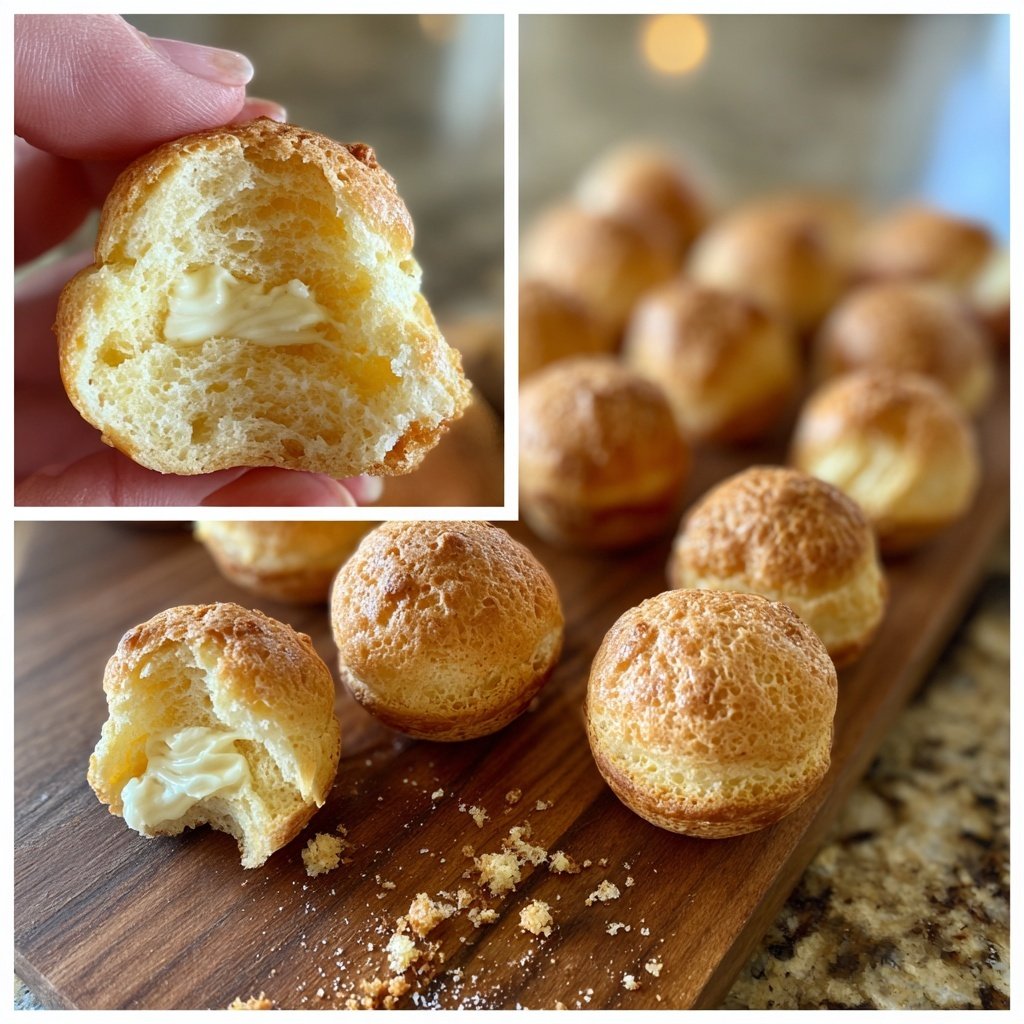
I love making Honey Vanilla Spring Puffs as the weather warms up, as they bring a delightful sweetness and lightness to any gathering. The fragrance of honey combined with the refreshing notes of vanilla creates an irresistible treat. You can prepare these delightful puffs quickly, and they are perfect for springtime picnics or brunch with friends. I enjoy experimenting with different fillings, but the honey vanilla cream is always a favorite. It's a wonderful way to showcase seasonal ingredients in a delicious dessert that's easy to share!
Creating these Honey Vanilla Spring Puffs was an adventure in flavor for me. I experimented with different techniques for achieving the perfect puff pastry, and I've found that using cold butter and not overmixing the dough allows for a better rise. Each bite is light and airy, just as I wanted it to be. Filling them with a luscious honey vanilla cream takes them to a whole new level!
During testing, I learned that allowing the cream to chill for a little while before piping into the puffs greatly improves the texture. The added honey balances the sweetness perfectly without being overpowering. I can't wait for you to try these delicate treats and see just how enjoyable they can be!
Why You'll Love These Delights
- Light and airy texture that melts in your mouth
- Delicious honey and vanilla flavor combination
- Perfect for spring gatherings and celebrations
Understanding Puff Pastry
Puff pastry is the star of this recipe, lending a light and flaky texture that complements the cream filling perfectly. When mixing the cold butter into the flour, aim for the consistency of coarse crumbs, as this will create the necessary layers during baking. Remember to handle the dough minimally to avoid warming the butter too much, which can result in tough pastry. The goal is to create distinct layers that expand when baked, achieving that desired airy quality.
Chilling the dough not only firms it up but also allows the gluten to relax. This is crucial for easy rolling and shaping when you're ready to bake. After refrigeration, look for a dough that rolls out smoothly without any cracks. If you find the dough is too soft after chilling, give it a quick chill in the refrigerator again before cutting into shapes. This will ensure your puffs stay puffy and don't flatten during baking.
Crafting the Honey Vanilla Cream
The honey vanilla cream filling is a highlight, offering a luscious contrast to the puffs' texture. For the best results, start with cold heavy cream, as this whips better and results in a fluffier filling. I recommend using a chilled mixing bowl and whisk to help achieve stiff peaks more efficiently. Whipping the cream until it is just right will prevent the mixture from turning grainy; stop right when you see stiff peaks forming, which usually takes about 3-5 minutes using a hand mixer.
Feel free to adjust the sweetness of the filling by varying the amount of honey. If you prefer a more intense vanilla flavor, you can also add an additional half teaspoon of vanilla extract. Another variation is to incorporate some finely chopped seasonal fruits into the filling, which can brighten the cream and add an unexpected twist. If preparing ahead of time, store the honey vanilla cream in an airtight container in the refrigerator for up to 2 days, but it's best enjoyed fresh.
Serving and Storing Tips
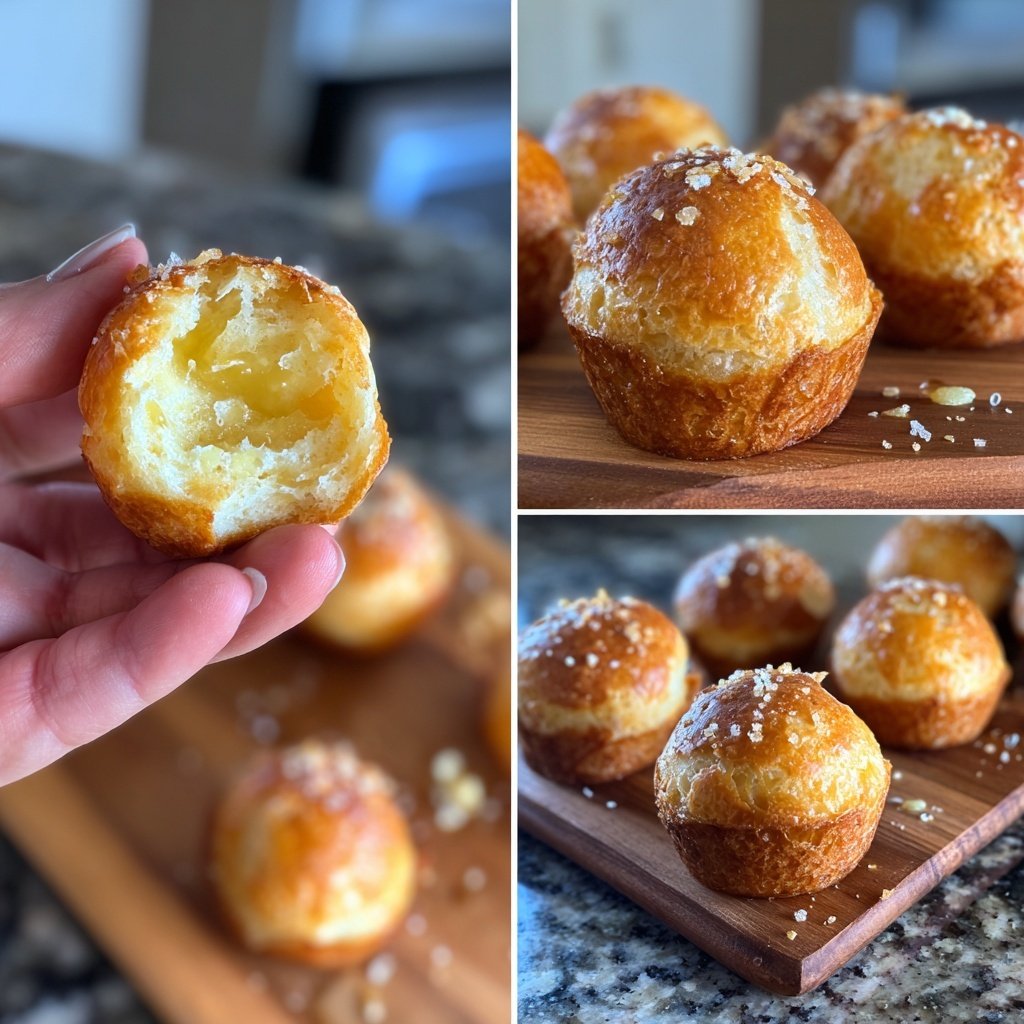
Once your honey vanilla puffs are filled, serve them immediately to enjoy the contrast of warm pastry and cool cream. For a stylish presentation, dust the filled puffs with powdered sugar right before serving; this adds a bit of elegance and sweetness. Consider pairing the puffs with a side of fresh berries or a drizzle of extra honey to enhance the seasonal theme of your gathering. They make a visually appealing addition to any picnic or brunch spread.
If you have any leftover puffs, store them in an airtight container at room temperature for up to 2 days. However, keep in mind that the texture may change, as they can become a bit soggy due to the cream. To preserve their lightness, consider filling only the number you plan to serve and storing the remaining puffs and cream separately. The puffs can be frozen before baking, allowing for an easy last-minute dessert by simply baking them straight from the freezer for an additional 3-5 minutes.
Ingredients
Ingredients for Honey Vanilla Spring Puffs
For the Puff Pastry
- 1 cup all-purpose flour
- 1/2 cup unsalted butter, cold and cubed
- 1/4 cup cold water
- 1/2 tsp salt
- 1 tsp sugar
For the Honey Vanilla Cream Filling
- 1 cup heavy cream
- 1/4 cup honey
- 1 tsp vanilla extract
- 1 tbsp powdered sugar
Ensure all ingredients are ready before starting for the best results.
Instructions
Instructions to Make Honey Vanilla Spring Puffs
Make the Puff Pastry
In a mixing bowl, combine flour, salt, and sugar. Add cold butter and mix until crumbly. Gradually add cold water and knead until the dough comes together. Wrap in plastic wrap and refrigerate for 30 minutes.
Prepare the Filling
In a separate bowl, whip the heavy cream until soft peaks form. Gradually add honey, vanilla extract, and powdered sugar, continuing to whip until the mixture forms stiff peaks. Chill the filling in the refrigerator.
Shape and Bake the Puffs
Preheat the oven to 400°F (200°C). Roll out the chilled dough and cut into desired shapes. Place them on a baking sheet and bake for 12-15 minutes, or until golden brown. Let them cool completely.
Fill the Puffs
Once cooled, slice the puffs open and pipe the honey vanilla cream filling inside. Dust with powdered sugar if desired and serve immediately.
Serve these puffs fresh for the best texture and flavor!
Pro Tips
- For an extra touch, you can drizzle some honey over the cream filling before serving for added sweetness and flavor.
Ingredient Substitutions
If you're looking to make this recipe dairy-free, replace the heavy cream with a coconut cream, which also gives a nice richness while pairing wonderfully with honey and vanilla. For the puff pastry, there are several store-bought options available that use plant-based fats instead of butter, ensuring everyone at your gathering can enjoy these treats. If you're in a pinch for time, pre-made puff pastry can save you preparation time without sacrificing flavor.
For a lower-calorie alternative, consider using Greek yogurt instead of heavy cream in your filling. While the texture will be different, it can still create a tangy and satisfying cream. Just be sure to sweeten it adequately, as Greek yogurt has a natural tartness.
Troubleshooting Common Issues
Should your puff pastry turn out dense or chewy, it may be due to overworking the dough. Remember to mix the ingredients just until combined and handle it as little as possible. Ensure that your oven is fully preheated, as this helps create steam quickly, causing the pastry to rise. If you notice that your puffs are not browning properly during baking, check the oven temperature with a thermometer; an inaccurate temperature can affect the rise.
If the cream filling hasn't thickened enough, this could be a result of not whipping the cream to stiff peaks or using cream that is not cold enough. Simply re-whip it for a minute while watching closely. Adding a bit more powdered sugar can also help stabilize the filling, especially if you’re using it later. Keep all components as cold as possible before assembling to maintain the best textures.
Questions About Recipes
→ Can I make the puff pastry ahead of time?
Yes, you can prepare the dough in advance and refrigerate it. Just allow it to come to room temperature before rolling it out.
→ What can I substitute for heavy cream in the filling?
You can use coconut cream or a dairy-free whipped topping for a lighter alternative.
→ How should I store the puffs?
Store any leftover puffs in an airtight container in the refrigerator for up to two days. For the best texture, fill them just before serving.
→ Can I add other flavors to the cream filling?
Certainly! You can experiment with other extracts like almond or hazelnut, or even fold in some fresh fruit puree for additional flavor.
Honey Vanilla Spring Puffs
Created by: The Sarahsfoodlab Team
Recipe Type: Spring Recipes | Fresh Season
Skill Level: Medium
Final Quantity: 12 puffs
What You'll Need
For the Puff Pastry
- 1 cup all-purpose flour
- 1/2 cup unsalted butter, cold and cubed
- 1/4 cup cold water
- 1/2 tsp salt
- 1 tsp sugar
For the Honey Vanilla Cream Filling
- 1 cup heavy cream
- 1/4 cup honey
- 1 tsp vanilla extract
- 1 tbsp powdered sugar
How-To Steps
In a mixing bowl, combine flour, salt, and sugar. Add cold butter and mix until crumbly. Gradually add cold water and knead until the dough comes together. Wrap in plastic wrap and refrigerate for 30 minutes.
In a separate bowl, whip the heavy cream until soft peaks form. Gradually add honey, vanilla extract, and powdered sugar, continuing to whip until the mixture forms stiff peaks. Chill the filling in the refrigerator.
Preheat the oven to 400°F (200°C). Roll out the chilled dough and cut into desired shapes. Place them on a baking sheet and bake for 12-15 minutes, or until golden brown. Let them cool completely.
Once cooled, slice the puffs open and pipe the honey vanilla cream filling inside. Dust with powdered sugar if desired and serve immediately.
Extra Tips
- For an extra touch, you can drizzle some honey over the cream filling before serving for added sweetness and flavor.
Nutritional Breakdown (Per Serving)
- Calories: 150 kcal
- Total Fat: 10g
- Saturated Fat: 5g
- Cholesterol: 25mg
- Sodium: 50mg
- Total Carbohydrates: 15g
- Dietary Fiber: 0g
- Sugars: 8g
- Protein: 2g